• Dirt. It’s a whole thing.
    Front garden bed at the end of summer

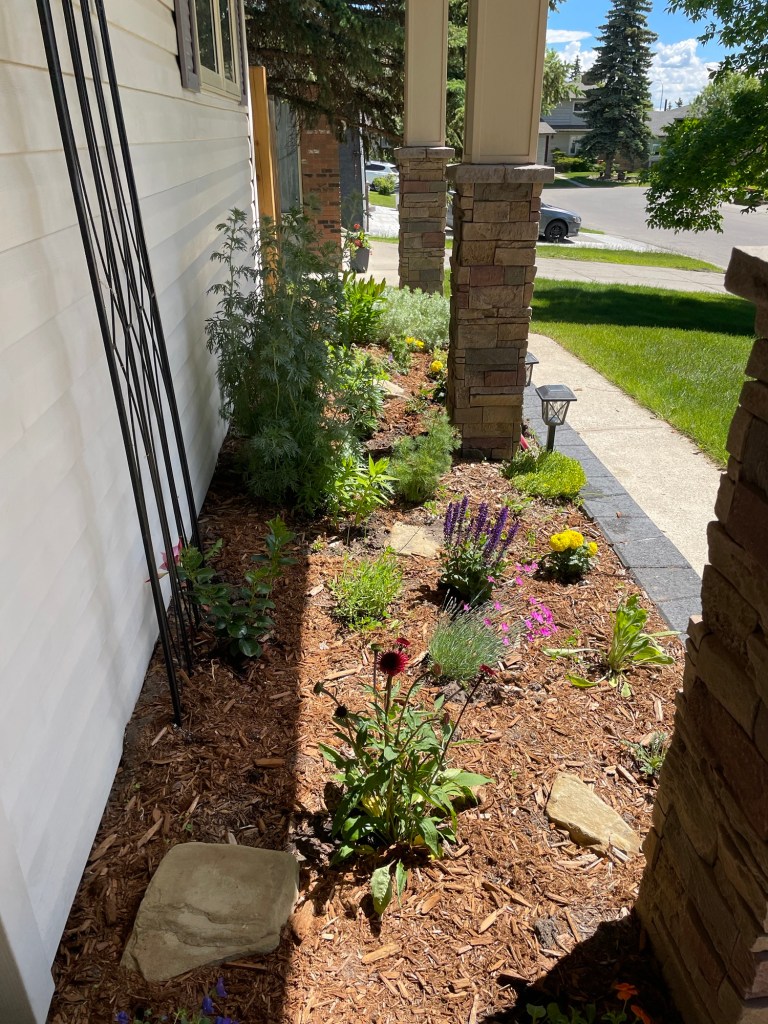
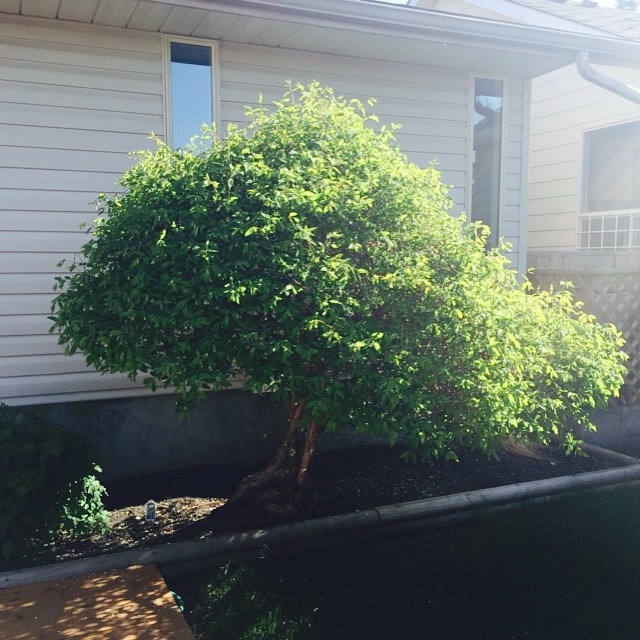
    When we first moved into our house, I loved the front garden bed. It had these cute little Christmas trees in it, some purple echinacea, and some bright happy orange lilies that popped up in the spring. I didn’t really pay it much mind, put the hose to it occasionally and that was that. But over time, the ornamental cedars started to dry out, and the coneflower seemed to shrink year over year. The lilies were happy, but that was about it. So we dug out the dead cedars (man oh man I needed my husband’s sawzall to get those roots out), put in a potentilla and some barberries, replaced the echinacea, and thought, that should do it! Well, a couple more of our Chinook winters and hot summers later, and we were in the same boat AGAIN. What the heck?

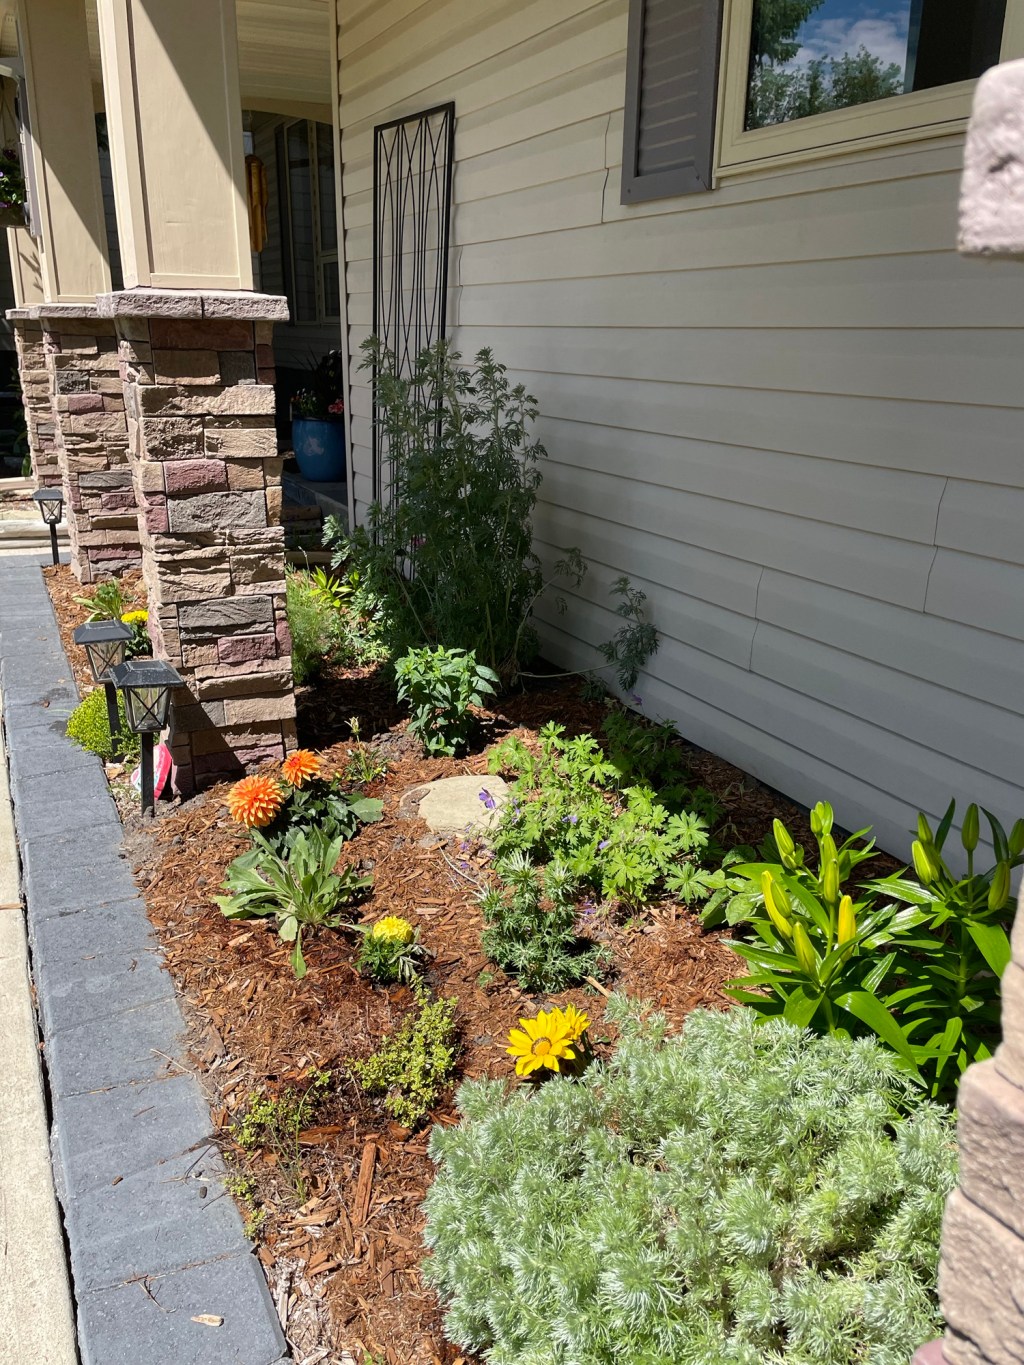
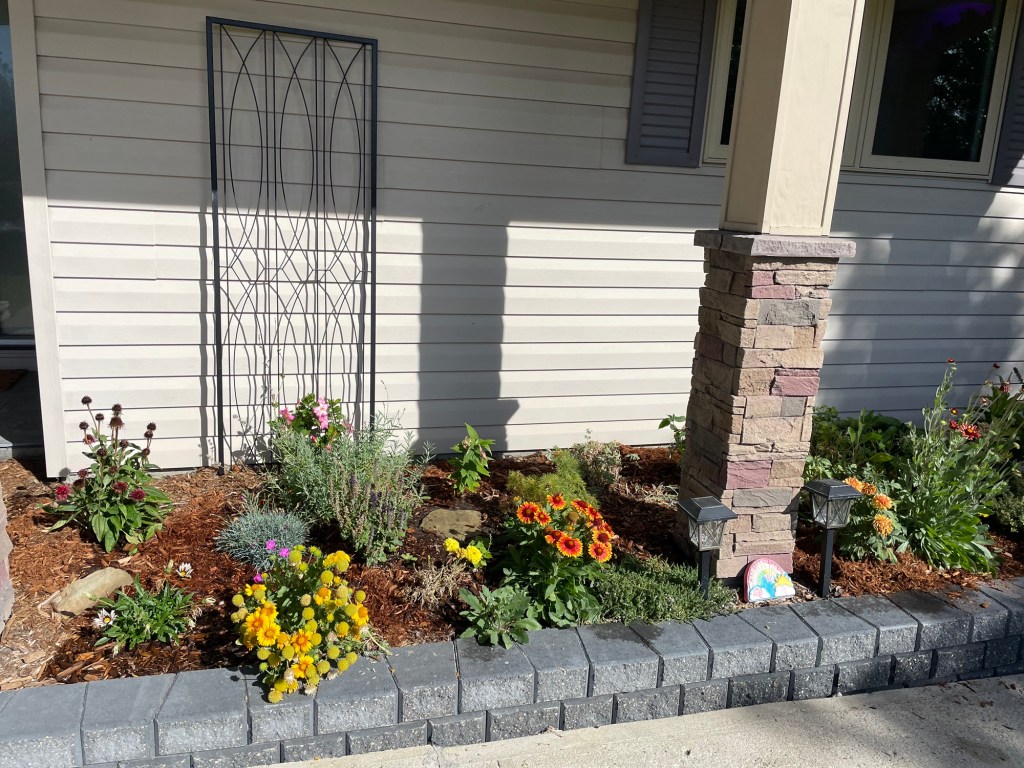
    The garden bed in question is south facing, and under a large overhang. It dries out very quickly and doesn’t get any natural water from rain or snowfall because it’s sheltered by that overhang. After taking a couple garden courses (the UofS soil sciences course is tough, but it’s a gooder!), I realized it needed help. I tried to amend it. I added compost. I mulched (but not enough). I watered it weekly. Still very poor yields. In all honesty, the soil was so clay-like it would have taken years to amend it and get it healthy again. So we bit the bullet and had it dug out. Put in some quality soil, and planted some new drought-tolerant perennials. This is the second summer and most of the perennials have come back and are thriving. Yay!

    And now the why:

    What was missing from the original soil? Well, there were a few things. Plants need nutrients but they also need some microorganisms that live in the soil. Like worms, they help plants take up nutrients, they break down organic matter in the soil, and they do a whole bunch more things that science can tell you about if you really want to dive down that wormhole. (See what I did there?). So when my soil got super dried out in the summers and through Chinooks, that certainly did not help support the other lifeforms. (Except the ants. They LOVE a dry place to build a nest. Lots and lots of ants). If I overwatered on the other hand, I ended up drowning everything. Having a soil that is well-draining is much better than one that acts like a retention pond on the other end of the spectrum.

    Plants also need aeration in the dirt. So if your soil is very dense/thick, it’s probably not helping those roots breathe (like when it’s overwatered). That’s why you see those perlite bits in potting soil for container gardening. They are there to help break up the soil, creating air pockets. In a natural environment, decomposing organic materials (bark, mulch), rocks, and even those pesky ants help provide these pockets. So how do you keep a decent level of moisture and air at the same time? Up the organic matter. Add in those things you see in a natural environment like tree bark/mulch along with some compost. As those break down they will add pockets and also make it nice and loamy. And it will encourage those organisms to move in that we want – worms to break up and down the soil into nutrients, and other little buggies and micros.

    When should you do this? You can do this really anytime, but in the spring and end of season are recommended by the experts. I personally like adding compost in the spring and then the mulch in the fall as it’s easier on the budget. Leaf mulch is awesome in the fall as it acts like compost and breaks down quickly over winter.

    There are of course various soil tests you can do to determine the soil texture and the Ph levels of your garden beds. The Calgary Horticultural Society has some DIY tips on their site and Lee Valley has some soil test kits. It can be a fun little science experiment if you or your kids are into that kind of thing. But unless you want to enter for garden of the year in your local community, I suggest starting with the above. I took the extreme measure by replacing the soil entirely as it was pretty hopeless. And sometimes it feels good to start fresh. The greatest thing is now I know how to maintain it properly.

    Early spring
  • How to Make Your Own Fire Cider With Local Ingredients
    AI generated image 😁

    Well my garden friends, the signs are here. The nights are getting longer and colder. The leaves are turning colour and starting to drop. Do you know what that means? It won’t be long until cold and flu season starts. So let’s get prepared with some immune-boosting herbal remedies. One of the most famous herbal tonics to make at home is fire cider—a zesty, warming infusion of herbs, roots, and spices steeped in apple cider vinegar.

    Originally popularized by herbalist Rosemary Gladstar, fire cider has become a staple in many herbal kitchens. The best part? It’s easy! You can make your own batch using locally grown produce and customize it to your taste. I’ve been making it for years, and every year it’s a little different.

    🌱 What Is Fire Cider?

    Fire cider is an herbal vinegar tonic combining immune-boosting, anti-inflammatory, and digestion-supporting ingredients. It’s often taken by the spoonful in the fall and winter months to support overall wellness. I’ve heard some people put it on their salads, hey, good for them.

    🌿 Key Ingredients

    Here’s the classic base recipe, adapted for what’s easy to grow or source locally:

    • Horseradish root (antimicrobial, clears sinuses)
    • Garlic (immune support)
    • Onion (antibacterial, supports circulation)
    • Hot peppers or chili flakes (boosts metabolism, warms the body. I grow my own in the summer, super fun!)
    • Ginger root (digestive aid, anti-inflammatory)
    • Apple cider vinegar (the base for extraction, choose unpasteurized if possible, I like Allen’s Organic Apple Cider Vinegar or any other organic option)
    • Citrus ok it’s not local to Calgary, but find yourself an organic lemon because we are using the rind as well and that can absorb a lot of chemicals. (Vitamin C).

    Optional add-ins:

    • Fresh herbs like thyme, oregano, or rosemary (antimicrobial, aromatic, and also medicinal)
    • Turmeric root
    • If you have local rose hips, feel free to add them in for more vitamin C support.

    🍯 How to Make Fire Cider

    1. Prep the ingredients. Chop equal parts onion, garlic, ginger, horseradish, and hot peppers. Aim for about ½ cup each.
    2. Layer in a jar. Pack into a clean glass quart jar until it’s about ¾ full.
    3. Add vinegar. Pour apple cider vinegar over the ingredients until completely covered. Use a piece of parchment under the lid if it’s metal to prevent rust. We aren’t looking for that as an additional supplement.
    4. Steep. Store in a cool, dark place for 3–4, even 6 weeks, shaking daily. I suggest the cupboard with your coffee mugs. 😉 (Hint: put a label on for when to strain it or a reminder in your calendar).
    5. Strain & sweeten. Strain the liquid through a fine mesh or cheesecloth, then stir in some local honey from your Farmer’s Market to taste. This also helps ease the acidity on sensitive stomachs. Don’t be afraid to add more honey if you need to. Honey is all kinds of good for us!
    It may look a little weird, you know it’s going to be good!

    🌟 Tips from the Garden

    • Grow your own garlic and onions—they’re easy to cure and store through winter.
    • Use hot peppers you’ve dried from summer’s harvest.
    • If horseradish doesn’t grow in your garden, ask local farmers—they often have an abundance.

    💡 How to Use Fire Cider

    • Take a tablespoon daily during cold season or when you’re feeling run down.
    • Mix into salad dressings, marinades, or cocktails for a spicy kick.
    • Add a splash to hot broth for a warming tonic.

    By making fire cider with locally grown ingredients, you not only boost your health but also support local growers and reduce your carbon footprint. It’s garden-to-cup wellness at its best!

  • What do These Three Numbers Mean? A Fertilizer Rundown

    Nutrients

    All plants require nutrients to grow. A pretty general statement, but it’s true. The top three nutrients are those three main numbers on your fertilizer package: nitrogen (N), phosphorus (P), and potassium (K). Or N-P-K. These are considered macronutrients, and are essential for most plant life and health.

    The rest of the macronutrient family are: calcium (Ca), sulfur (S), magnesium (Mg), carbon (C), hydrogen (H), and oxygen (O). Then we get into micronutrients like boron, manganese, and copper and so on. It can get a little plant specific, but most general fertilizer formulations will also contain some of these elements.

    The numbers on the label indicate the ratio or percentage of each element in the mix. For example, 10-10-10 means a pretty even mix of 10(N)-10(P)-10(K). If you see one that says 10-20-10, it’s heavier on that middle phosphorous(P) element. Now if you’re asking what’s in the rest of the mix because that doesn’t add up to 100 percent, the answer is other ingredients which help the plant take up or convert the elements into forms they can use. It’s a whole thing, but it’s not hugely important for you to specifically remember as we aren’t horticulturists.

    Anyways, here’s how they help your plants:

    Nitrogen: Essential for plant growth and helping chlorophyll production (makes those leaves green). I over-fertilized a plant once with too much nitrogen and the poor leaves went super dark green, wilty, and then it up and died. So yes, you can give too much of a good thing. Yellow leaves on the bottom the plant can indicate a lack of nitrogen, as plants will pull that nutrient from older leaves up to help in the production of newer ones up top.

    Phosphorus: Helps with root growth and flowering. It also helps with photosynthesis. If a plant doesn’t get enough phosphorus, it may delay flowering and have sad brown leaves. And if the older leaves are turning purple in colour, this could also be an indication it needs a little boost.

    Potassium: I think of this one as the ‘strengthener’ as it helps your plants stay healthy. It aids in water absorption and helps your plant withstand environmental changes like temperature drops or drought. It helps during the flowering stage which plants need to make fruit and seeds. An indication of a lack of potassium can be dark spots appearing on the leaves or browning along the edges of older leaves.

    So when do you fertilize _____?

    If we are talking about our houseplants: In the winter, most plants slow their growth due to the lessening of sunlight. It’s recommended to fertilize every couple months. In the summer when plant growth is stimulated by warmer temps and increased daylight, it’s recommended once a month. But remember, some plants, like your cactus, don’t need much at all. Ask your local greenhouse person if you’re unsure.

    Now let’s shift our focus outside. When you’re first planting your annuals in that pot on your patio, definitely give it some fertilizer! You want that plant to establish itself quickly in it’s new home. I use a 10-20-10 mix (always read the package instructions) because I want to encourage root growth and help the existing flowers keep their glory. And if it’s a smaller pot, I will fertilize on the weekly. I once had some beautiful ‘Stargazer’ petunias – you know the dark purple ones that have white spots on them so they look like a starry night sky? I didn’t apply fertilizer, and the plants ended up losing their stars and reverting back to a plain old solid colour. I was so disappointed! But the lack of nutrients meant the plants couldn’t ‘perform to their full potential’. Lesson learned for the next year, especially when we invest so much in our gardens.

    Tomatoes and other vegetable/fruit producing crops require specific and frequent fertilizing. Blossom end-rot in tomato fruit is a frequent complaint for first-time gardeners. It can be caused by a lack of calcium and also infrequent watering when plants can’t deliver the nutrients to where they are needed. Calcium improves cell growth (roots, bud growth, etc) and contributes to overall plant vigor. So tomato fertilizers specifically include calcium as part of their formula. BUT (big BUTT here) you need to apply this at the beginning of the season! You can’t “fix” what’s already broken in this instance. Let’s give our plants a healthy start! Stay on top of watering those tomatoes consistently all season, too, and that will help immensely.

    There are slow release formulations for your over-stuffed hanging pots and larger flower containers especially since these ones require frequent watering. If I’m watering something almost every day, I’m probably not going to remember when I fertilized it last. Plus, it’s cheaper. It won’t be organic, probably, but the calibrachoa doesn’t care.

    Which brings us to organic versus inorganic formulas. I think it’s really up to your own preference. Inorganic formulas are manufactured to be picked up easily by the plant (and can be quick release, or slow-release). Organic formulas are carbon-based and made from living things like seaweed, bonemeal, and so forth. I like to use organic products in my house and with most of the plants I am going to eat. However, on a cost basis, I don’t really object to using a inorganic fertilizer on the heavy feeders like those tomatoes. Heavy feeders require more frequent application and on a cost and nutrient-specific application, it makes sense to use the product best suited to the need.

    When things start to wind down before harvest, I ease off on fertilizing. I want the plant to focus on finishing the existing fruit/veg and not on growing another branch. Speaking of – please stop pulling all the leaves off your tomatoes! They need those leaves for photosynthesis! Remember our elementary school science? Photosynthesis produces energy for all plant growth, including that fruit you want for salsa. By all means trim them, but don’t strip them bare.

    For more information on fertilizing plants, I suggest checking out the University of Minnesota’s page here as they have a great little guide.

    Happy gardening!

  • I did what you told me to, now what?

    Time to Pot Up, Buttercup!

    Your garden-centre finds have been hardened off appropriately and now it’s time to give them their dream summer home.

    Here’s how to pot like a pro:

    🪴 Pick your dirt: Go for high-quality potting mix, not garden bed soil. Look for a blend with peat, perlite, and compost for drainage & nutrients. I’m a fan of Pro-mix (read the labels) and it’s cheaper at Canadian Tire than it is at the garden centres (no offense to them!).

    🪴Before you fill the pot, check and make sure it has drainage holes. Then stick a small pebble/rock over them. Water can still drain out, but you won’t lose as much of your expensive dirt when it does. 😉 This time old trick was provided by my mother-in-law. Thanks Cheryl!

    🪴Try not to pull the plant out of its provided plastic container by its stem or leaves – loosen the dirt in the pot by rolling it on its side if you can, or loosening the edges with your spade. Once you’ve got it out, if there’s lots of roots at the bottom and it’s pretty hard-packed, feel free to loosen those roots, too. Don’t be afraid if some of them break. We want to give them a chance to spread out and down, and “breath” a little!

    🪴Unless you’re a tomato or potato plant, don’t go higher with the soil level on the stem than originally planted.

    If you’re wanting to do some fancy bigger pots:

    🌱 Follow the classic Rule of 3: Thriller, Filler, Spiller

    Thriller: a tall star (like dracaena, fountain grass or even bright geraniums)

    Filler: a mid-height bloomer (petunias or those geraniums)

    Spiller: a cascading plant that flows over the pot edge (sweet potato vine, alyssum, calibrachoa, or even ivy)

    Have fun with it! There’s no set rules.

    Aftercare:

    💧Water consistently: daily in hot weather, but always check the soil first.

    🌼 Use a balanced liquid fertilizer every 1–2 weeks (or slow-release pellets if you’re forgetful. I never did well with the “sticks” myself, tho). I like the Organic Evolve liquid brand – doesn’t smell too great, but it works: just remember to read the instructions and dilute accordingly. Yes, you can over fertilize and kill your little green babies.

    🍃 Deadhead blooms = more flowers. I can provide more info on this later.

    Happy potting! 🧤🌼

    (And yes, it is normal to talk to them and name them while you do it. They love your CO2.)

    For more info on dirt for your garden beds
    👉🏻 http://bit.ly/4ji8DS6

  • How to Harden Off Your Plants the Right Way

    The first long weekend is coming up! And that’s usually the kick-off for most YYC gardeners. It’s early this year, so I’m offering some sage (get it?) advice to harden off your plants. Cause you can’t just buy ’em and plant ’em. They would die. And you would be sad.

    🪴 Days 1–3: When temps are moderate (think above 10°C), place your plants outside in the shade for a couple of hours. Bring them back in before it cools off too much.
    🪴 Days 4–6: Gradually increase their time outside and start introducing them to dappled sunlight. Still bring them in at night!
    🪴 Days 7–9: Let them hang out in full sun for a few hours, slowly working up to a full day. By now, they should be staying out all day and only coming in if there’s risk of frost.
    🪴 Day 10+: Your plants should be toughened up and ready to go in the ground or into containers full-time, weather permitting.

    Remember, Calgary May Long is unpredictable (remember camping in the snow?) especially overnight lows. A little patience now means healthier, stronger plants all season long.

  • “I just want something I can’t kill.”

    For all you “low-maintenance” gardeners heading to the garden centre this weekend, this post is for you.

    There’s a reason these plants are considered a standard and stacked high at every Calgary nursery:
    They can take on dry August heat, a rogue hailstorm, your “I went away for the long weekend” neglect, and still bloom all season long.

    🪴Petunias: These come in all colours and sizes now. Look for Wave Petunias (perfect for trailing over containers) or Supertunias (less deadheading = more time to sip wine).

    🪴Geraniums: Add height and bold colour to any container. They handle heat, chill, and an occasional accidental drought. Plus! pests aren’t fans.

    🪴Sweet Alyssum: A quick-growing “filler plant” that softens edges and attracts hoverflies (the cute little bee lookalikes that actually eat aphids—yes please).

    🪴Marigolds: Not my fave smell, but who can argue with those happy, poofy, sunshine colours? They repel bugs, sometimes deer, and keep blooming into fall for the bees. And you, of course.

    And for your patio table:
    Grab a pot of lavender (so soothing!) or a mixed herb container.
    Just skip the basil unless you know exactly where your watering can is at all times. (Drama mama).

    Watering tip:
    Place your containers where you’ll walk by often. That way, you’ll enjoy them more and you might actually remember to water them. (We can hope.)

  • Know Your Limit & Garden Within It!

    Here’s your friendly reminder before you roll into the garden centre like it’s a plant party (because it is, let’s be honest):

    🪴 Start with a list. Write down your must-haves – those plants you know you can grow and already have a spot for. Get those into your cart first before you get distracted by all the shiny flowers. (Magpies, I see you.)

    🪴 Pick one “showstopper.” Not twelve. Just one statement plant to be the star of your garden this year. Simplicity often makes for the most stunning spaces.

    🪴 Set a budget. Garden centres are magical, must be all the fresh oxygen. Don’t fall under the plant spell. Try your best to stick to your spending limit.

    🪴 Got room in the budget? That’s when you get your splurge plant. Mine’s the hibiscus in the pic—totally worth it.

    Happy planting, friends! And remember: your garden, your rules, and we don’t judge if you break ‘em.

  • Give Your Houseplants a Spring Refresh: Repotting, Fertilizing, and Watering
    Meet Priscilla. She’s very much looking forward to summer humidity. She also loves her statement pot.

    As the outside temps warm and the days get longer here in Calgary, our attention tends to shift to the backyard. But I’m here to give you a little nudge: don’t forget about your inside plants!

    Your tropicals are waking up with the longer daylight and stronger sun coming through the windows, and they need a bit more attention. Now’s the time to pot up any plants whose roots are pushing out the bottom of their containers. It’s also the right moment to give them a little extra fertilizer—and you may need to bump up their watering schedule, too. As they respond to your TLC, you’ll see new shoots and fresh growth popping up.

    🪴 Potting Up: What You Need to Know

    Choosing a new pot can be fun, especially if you don’t already have one on hand. Go out and grab a conversation starter: something bold that will stand out on the shelf and show off your Priscilla. Most local greenhouses have a great variety to choose from in their gift shop. Personally, I love Spruce It Up‘s selection here in YYC.

    Most plant experts will tell you to pick a pot that’s only an inch or two bigger than the current one. Here’s why that matters:

    1. Preventing root rot: A much larger pot holds more soil, which will retain water longer, leading to soggy roots and decreased plant health. Especially for plants that like to dry out between watering.
    2. Healthy root growth: If you give a plant too much space for the roots, the growth is going to concentrate in the roots, rather than those decorative leaves and flowers you like so much.
    3. Soil ‘health’: Too much soil without roots and organic matter can get compacted and your Priscilla’s roots need oxygen, too. Plus, really, why waste dirt?
    4. Plant shock: Plants don’t like drastic change.This includes pot size. Have I told you about my drama mama, the peace lily?

    🌿 Fertilizer: Fuel for Growth

    I follow a simple rule of thumb with fertilizer: in the winter, I usually feed my plants only once every couple of months. Like me, they’re not doing much other than lying around on the couch,I mean, shelf, when it’s cold and dark.

    But when the sun comes out for longer, they get more energy and need more fuel to support new growth. Stick with a general all-purpose fertilizer and move to a monthly feeding schedule – unless you have some diva plants that need a special formula.

    💧 Watering: Listening to the Plant Tantrums

    Like a toddler, your plants will let you know when they need something—sometimes with dramatic flair. Shriveled, crusty yellow leaves? Yep, that’s a tantrum.

    Make a habit of inspecting them every so often so you can catch the signs early and adjust their watering schedule as needed. They’ll thank you with lush new growth (and slightly fewer emotional outbursts).

    🌱 Conclusion: Spring Forward, Plant Style

    Spring is the season of growth for all plants, inside and out! A quick refresh, a bit of new soil, and a boost in care might be all your indoor jungle needs to thrive. Take the time now, and you’ll be rewarded with vibrant, happy plants all summer long.

    Happy growing!

  • Dreaming up your perfect garden? It’s such an exciting project — but without a little planning, it can get overwhelming (and pricey) fast. No matter if you’ve got a small backyard or a big open space, having a simple plan makes it way easier — and way more fun — to create something beautiful that fits your life and your budget.

    1. Start with a Plan

    Before digging into the soil, take the time to visualize your ideal garden. Consider these key questions:

    • 🌱 What is the primary purpose of your garden? (Relaxation, growing food, entertaining, etc.)

    • 📏 How much space do you have to work with? How much sun or shade will your plants be receiving?

    • 💰 What is your budget?

    💡 Tip: Sketch out your ideas or use a free online garden planner to map out your space. A well-designed plan prevents costly mistakes and ensures your garden evolves the way you envision it.

    2. Set a Realistic Budget

    Gardening costs can add up quickly, so it’s important to allocate your budget wisely. Prioritize essential items such as soil, mulch, and plants before splurging on decorative elements.

    Budget-Friendly Gardening Tips:

    ✅ Start small and expand over time.

    ✅ Buy plants in smaller sizes—they grow quickly and are more affordable.

    ✅ Swap plants with neighbors or join a local gardening group to share cuttings and seeds.

    ✅ Look for second-hand garden tools and materials at thrift stores or online marketplaces.

    3. Choose Plants for Your Grow Zone

    Selecting plants suited to your local climate is key to a thriving garden. Check your Hardiness Zone to determine what plants will thrive in your area.

    🌿 Plant Selection Tips:

    • 🌻 Opt for native plants—they require less water and maintenance.

    • 🌼 Choose perennials over annuals for long-term cost savings.

    • ☀️ Pay attention to sunlight and soil needs to ensure plants are placed in the right spots.

    4. Invest in Quality Soil and Mulch

    Healthy soil is the foundation of a successful garden. Conduct a soil test to determine its pH and nutrient levels, then amend as needed.

    Why Mulch Matters:

    🌾 Retains moisture & reduces water usage

    🛑 Suppresses weeds

    🌡️ Regulates soil temperature

    💡 Tip: Add compost and organic matter to improve soil structure and fertility.

    5. Create a Low-Maintenance Garden

    If you want a stunning garden without hours of upkeep, focus on low-maintenance design principles.

    Low-Maintenance Gardening Hacks:

    • 🚰 Group plants by water needs to simplify watering.

    • 🌿 Use ground covers to minimize weeds.

    • 💦 Install an irrigation system or soaker hoses to save time.

    • 🏡 Incorporate hardscaping (gravel paths, pavers, raised beds) for structure and accessibility.

    6. Think Long-Term: Sustainability & Growth

    A dream garden should be designed to evolve over time.

    🌍 Sustainable Gardening Ideas:

    ♻️ Start composting to enrich your soil naturally.

    💧 Collect rainwater to reduce water costs.

    🌳 Plant trees and shrubs with future growth in mind to prevent overcrowding.

    7. Personalize Your Space

    Your garden should reflect your personality and lifestyle. Whether it’s adding a cozy seating area, a small herb garden near the kitchen, or a trellis for climbing roses, incorporating personal touches will make your garden feel like an extension of your home.

    Final Thoughts

    Creating your dream garden doesn’t have to be expensive or high-maintenance. With careful planning, smart plant choices, and sustainable practices, you can design a beautiful outdoor space that brings joy for years to come.

    ✨ What’s your biggest challenge when it comes to gardening? Share your thoughts in the comments below!

  • My Bee-Friendly Favourites

    Every spring and summer, my social media feeds light up with passionate pleas to save the pollinators. Bees and monarch butterflies flash across the screen beneath headlines warning that they’re disappearing. And honestly? That kind of messaging can really hit a gardener where it hurts—especially as we cheerfully tuck non-native annuals into pots and wage war on the nettles and dandelions.

    The experts tell us that pollinators are especially drawn to blue, purple, and red blooms. That’s because bees can see ultraviolet light, giving them access to a broader spectrum of colour than we humans can perceive. Over the years, I’ve come to recognize a few “bee favourites” in my own Zone 3 garden—plants that consistently draw in buzzing visitors and earn their keep year after year.

    Here are a few of my go-to pollinator pleasers:

    Gaillardia (Gaillardia aristata, Gaillardia x grandiflora)

    Whether it’s a native species or a cultivated hybrid, Gaillardia is tough, cheerful, and blooms for ages—well into the fall, when many other plants are past their prime. Bonus: it’s a hardy perennial in colder zones and doesn’t ask for much in return.

    Gaillardia with multiple bees, photo supplied by author

    Sunflowers (Helianthus annuus)

    Few things make me smile like spotting a drowsy bee snoozing on a sunflower first thing in the morning. While the towering giants are stunning, there are also dwarf varieties that bloom earlier and stay compact, perfect for smaller spaces and shorter growing seasons.

    Helianthus annuis with bee, photo supplied by author

    Borage (Borago officinalis)

    This edible, self-seeding herb is as popular with bees as it is with herbalists. Its star-shaped blue flowers are nectar-rich, and while it can be a bit of a wanderer—popping up wherever it pleases—it’s hard to stay mad at such a bee magnet. Garnish your next gin drink with the flowers, you won’t be disappointed.

    Borage officianalis with bee, photo supplied by author

    Cucamelon (Melothria scabra)

    This one’s a bit unexpected, I know! But on cooler mornings, when I’d swing open the greenhouse doors, I’d always have a little bee companion darting straight to the delicate flowers of this quirky vine.

    Cucalmelon/gerkin, photo supplied by author

    Lavender (Lavandula angustifolia)

    No surprises here—lavender is beloved by bees, butterflies, and hoverflies alike. It’s also a lovely, low-maintenance plant with soothing fragrance and tidy looks. What’s not to love?

    Lavandula angustifolia, photo supplied supplied by author

    Hyssop (Agastache foeniculum)

    This purple-flowered perennial smells like a cross between licorice and mint, and it’s constantly in motion with visitors—from honeybees to moths to butterflies. It blooms late into the season and looks beautiful doing it.

    Agastache, photo supplied by author

    And lastly… my mystery shrub.

    I call it my “fairy tree.” It’s one of the first things to leaf out in spring, and it erupts with tiny white flowers that absolutely vibrate with bumblebees. You can hear it before you see it. Later in the season, it produces small purple berries that I’ve never dared taste. I haven’t been able to properly identify it—so if anyone recognizes this description, I’d love to know what it is!

    Fairy tree!

    Pro Tips for a Pollinator-Friendly Garden:

    Avoid pesticides: Even organic options can be harmful to pollinators—especially when applied during bloom time.

    Aim for a season-long buffet: Include a variety of plants that bloom from early spring to late fall. Bees are active longer than you think!

    Let things go a little wild: Dandelions, clover, and nettles are important early and late-season food sources for many species.

    Plant in clumps: Pollinators prefer mass plantings over single, scattered blooms—it’s more efficient for them.

    Provide water: A shallow dish with pebbles gives bees a safe place to land and drink.

    Include native plants: These are better adapted to your local pollinators—and often hardier in tough Zone 3 conditions.

    So what are your bees buzzing about? Share your pollinators’ favourites in the comments below. I’d love to hear it!

  • How to Make an Easy Calendula Salve at Home

    A Simple DIY Recipe for Soothing Skin Care

    Calendula is a powerhouse when it comes to natural skincare. With its soothing, anti-inflammatory, and healing properties, it’s a must-have for homemade herbal remedies. If you’ve got an abundance of calendula growing in your garden (or access to dried calendula), making a DIY calendula salve is an easy and rewarding project.

    This guide will walk you through the simple steps to create a nourishing calendula salve using natural ingredients.

    Why Use Calendula Salve?

    Calendula-infused salve is great for:

    ✔ Soothing dry, irritated skin

    ✔ Helping minor cuts, scrapes, and burns heal faster

    ✔ Reducing redness and inflammation

    ✔ Nourishing chapped lips or rough hands

    Ready to make your own? Let’s get started!

    Ingredients You’ll Need

    • 1 cup dried calendula flowers

    • 1 cup carrier oil (extra virgin olive oil, grapeseed oil, or sweet almond oil)

    • 1 ounce beeswax pellets or grated beeswax

    • 5-10 drops essential oils (optional – lavender, ylang ylang, or orange blossom)

    Tools & Equipment

    ✔ Salad spinner (or paper towels for drying fresh flowers)

    ✔ Dehydrator (or a mesh drying rack)

    ✔ Glass mason jars (for storing dried flowers and infused oil)

    ✔ Fine-mesh strainer & cheesecloth (for straining the infused oil)

    ✔ Double boiler setup (a metal mixing bowl over a pot of simmering water)

    ✔ Sterile spatula (for stirring the beeswax)

    ✔ Sterile glass jars or tins (for storing the finished salve)

    Step-by-Step Recipe: DIY Calendula Salve

    1. Harvest & Dry the Calendula Flowers

    If you’re using fresh calendula flowers:

    • Pick the flower heads and rinse them thoroughly.

    • Spin dry using a salad spinner or pat them dry with a clean towel.

    • Lay them out in a dehydrator on the lowest temperature setting for 1-2 days.

    • No dehydrator? Spread them on a mesh drying rack in a cool, dry place with good airflow.

    Store dried calendula in a glass jar in a cool, dark place until ready to use.

    2. Infuse the Calendula in Oil

    1️⃣ Fill a mason jar with dried calendula flowers.

    2️⃣ Pour your chosen carrier oil over the flowers until fully submerged.

    3️⃣ Store the jar in a warm, dark place for 2-4 weeks, shaking it daily. (Placing it near your coffee or tea stash is a great reminder!)

    4️⃣ Once infused, strain the oil using cheesecloth and a fine-mesh strainer, pressing gently to extract all the goodness.

    3. Melt the Beeswax & Mix with the Infused Oil

    1️⃣ Set up a double boiler by placing a metal bowl over a pot of simmering water. (The bowl should not touch the water!)

    2️⃣ Pour the infused calendula oil into the bowl and add the beeswax.

    3️⃣ Stir occasionally with a sterile spatula until the beeswax is fully melted.

    4. Add Essential Oils & Pour into Jars

    ✔ Remove from heat and stir in 5-10 drops of essential oil (if using).

    ✔ Quickly pour the warm mixture into sterilized glass jars or tins before it starts to harden.

    ✔ For a decorative touch, sprinkle a few dried calendula petals on top.

    5. Cool & Store Properly

    ✔ Let the salve cool completely for a few hours before sealing the jars. (This prevents condensation, which can cause spoilage.)

    ✔ Label each jar with ingredients and a use-by date (best within 1-2 months for freshness).

    🌿 Pro Tip: Keep your tools and containers sterile to extend shelf life!

    Customizing Your Calendula Salve

    ✅ For extra healing properties, add other herbs like chamomile or comfrey.

    ✅ Use different essential oils to customize the scent and benefits. (Lavender for relaxation, tea tree for antibacterial properties, etc.)

    ✅ Want a softer salve? Reduce the beeswax slightly for a more spreadable consistency.

    Final Thoughts

    This easy calendula salve recipe is a fantastic DIY skincare project that also makes a thoughtful homemade gift. Simply tie a ribbon around the jar for a rustic, handcrafted touch.

    🌿 Give it a try and let us know how it turns out! Have you made calendula salve before? Drop your tips in the comments!

    The finished product